If you’re like most computer users, then the thought of losing all your data due to a hard drive failure or malware infection can be terrifying. That’s why it’s so important to have a reliable disk clone software installed on your system.
But what is disk clone software, exactly? Essentially, it’s a tool that allows you to create an exact copy, or “clone”, of your entire disk. This includes not only your files and folders, but also your operating system, applications, and settings. This article will tell you how to clone hard drive with details.
Why do you need disk clone software?
For starters, it provides peace of mind. Knowing that you have a complete backup of your data means you don’t have to worry about losing valuable data if something goes wrong.
Additionally, disk clone software comes in handy when upgrading to a new computer or hard drive. Instead of manually transferring files and reinstalling programs, you can simply clone your old drive onto your new one.
There are many different disk clone software options available on the market, but one that stands out above the rest is AOMEI Backupper Standard. Keep reading and you will learn a few reasons why we recommend it.
Best disk cloning software – AOMEI Backupper Standard
The best free cloning software – AOMEI Backupper Standard can help you clone non-system data disks to a new one free of charge and without losing data. It can help you directly migrate the same settings from the original disks to the new one in its original configuration. Here is a list of its powerful features you can learn about:
Intelligent Clone allows you to clone only used partitions to the new disk, which means you can clone larger disk to smaller ones.
Sector By Sector Clone allows you to make a 1:1 copy of the old hard disk, and clones all the sectors in order.
SSD Alignment allows you to optimize the reading and writing speed of the target disk if it is an SSD.
It supports various disk brands such as Western Digital, Crucial, Seagate and different disk types like SATA/M.2/NVMe.
Stepwise guide to clone disks to a new one with AOMEI Backupper

- Install the target disk properly. Make clear whether your computer has only one slot or more than one, if there is only one, you need to prepare a SATA-to-USB connector to connect it to your PC.
- Backup your important data. Since the disk cloning process will cover all data on the target disk, thus if there are any important files on it, back them up if still work for you.
- Download and install the best free disk clone software AOMEI Backupper on your PC to have a try. It supports all Windows operating systems such as Windows 11, 10, 8.1, 8, 7, Vista, XP.

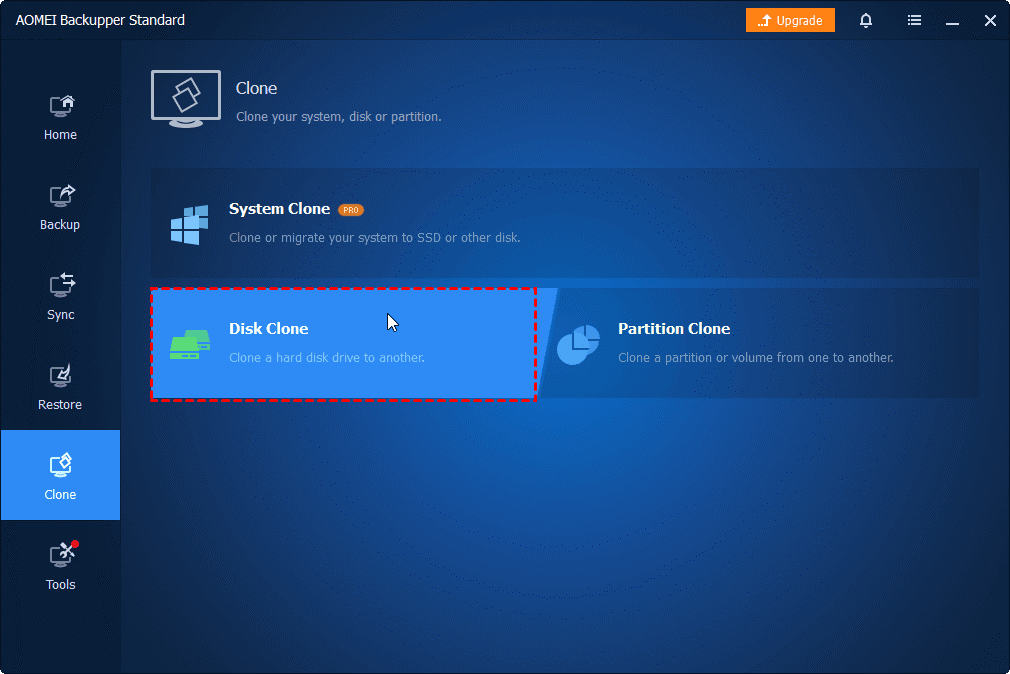
Step 1. Open AOMEI Backupper to begin the disk clone process. Once you enter the homepage, click on Clone and then select Disk Clone. If you want to clone system to disk, then you can select System Clone instead.
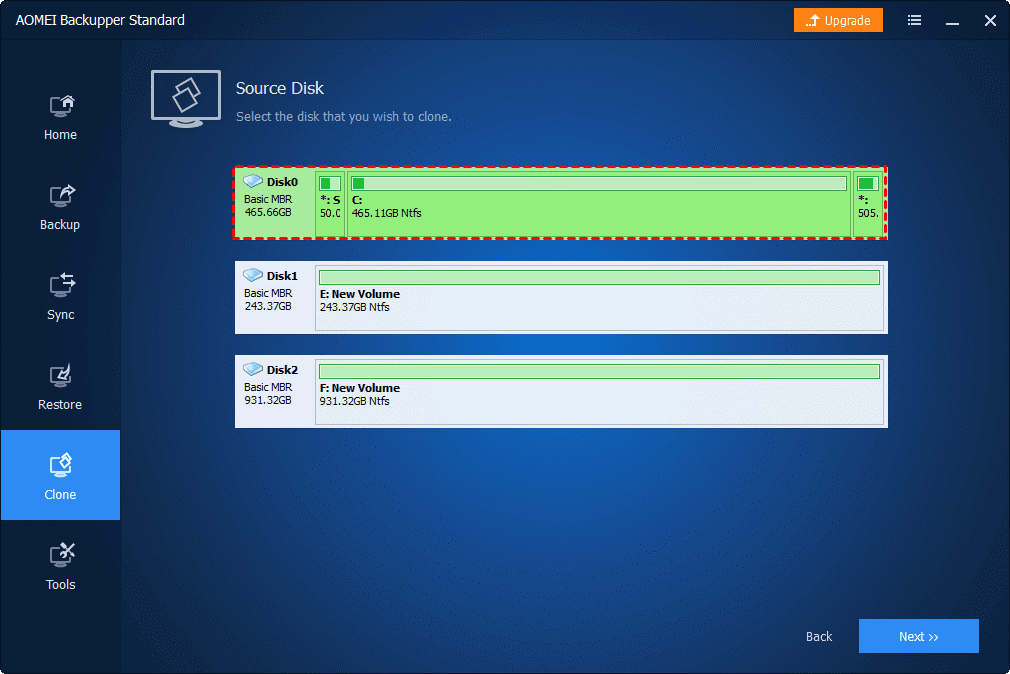
Step 2. Select the target disk (here refers to disk0) as the source disk, and then choose the new disk as the destination disk (here refers to disk1). Then click Next.
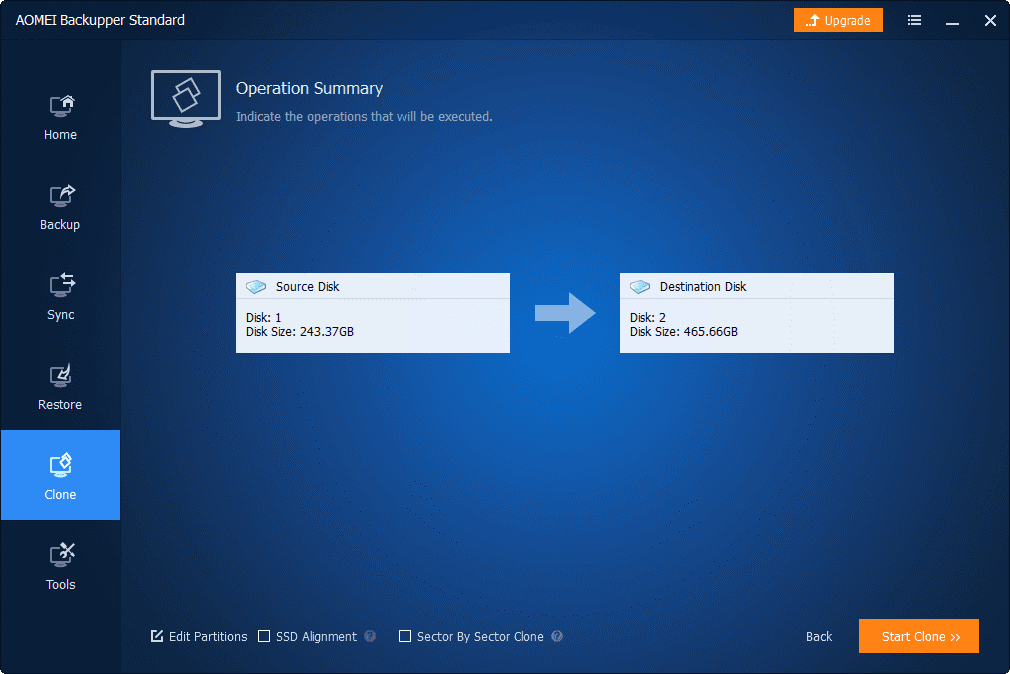
Step 3. Confirm the configurations and then click Start Clone. Please check the SSD alignment option to boost the performance of the SSD if your target disk is an SSD.
Wait for the process to complete. The clone time depends on the amount of your data to transfer.
Conclusion
If you don’t know how to choose a reliable disk clone software to transfer your data to a new disk, then you cannot miss this article. Here, you can gain the best choice of AOMEI Backupper to meet all of your needs, and transfer data securely and easily without losing them.
Meanwhile, as the best disk wipe tool, it supports you to enable Dell secure erase SSD securely and start it fresh. It indeed can be your trusted one to safeguard your data security. Why not give it a try?


